The loft is a foreign country... well, at least partly. Years ago I put some nice pine boards down over half of it, but the other half - the side near the neighbours - was neglected, and is a pit of dust and spiders, though it has the inverter for the solar system on the dividing wall. Anyway, for <reasons> I got all enthusiastic and decided to board it. Having observed a video or two on Youtube I realised that the govt's guidance for insulation is 270 mm; I have a nominal 100 at the moment, but it was put in rather shonkily by the previous inhabitant, probably at the behest of his wife, because he didn't bother finish behind the chimney breast and hid a few rolls of spare insulation there.
Most of the point of this post is to link to pix I took of the work, so that later I can find all the pipes and wires that got hidden.
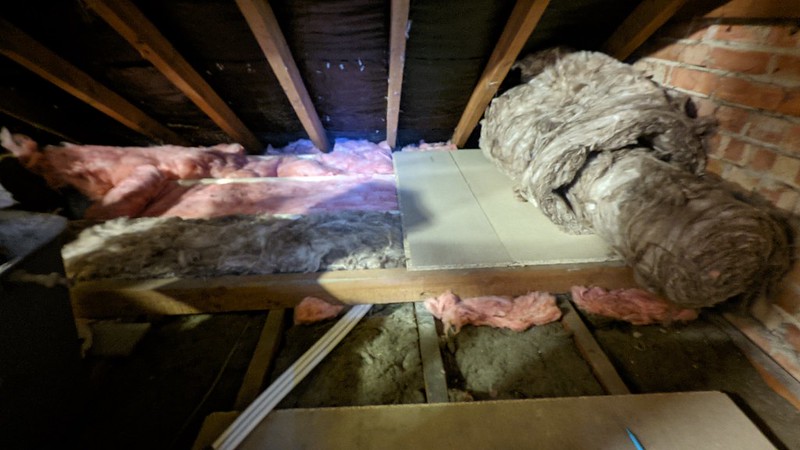
We begin with "before". the water pipes are from rework in 2006ish. The old insulation really is grey, mostly, though it's also covered in dust. View off Lwards, from slightly forwards. Note old wasps nest remains, which I cleared away.
Cost so far is: £32 + 35 + 120 + 122 + 170 +135 + 98 + 18.
Example: £122 was Eko base layer loft ins x2, 38; 4x1 x4, 23; chipboard loft floor 3 pack x4, 35. Plus some bits. £98 was 2 more chipboard packs o' 3; two jigsaw blades; another 4 x 4x1; one 2x3; omre screws (50 x 3.5x50).

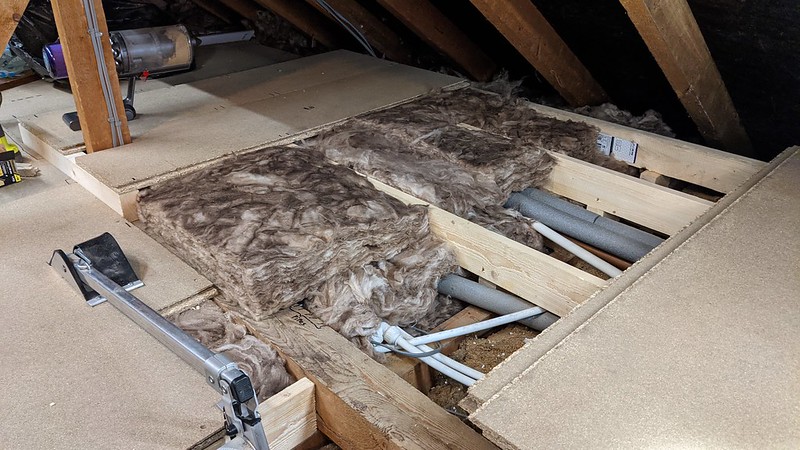
I refreshed the insulation with some pink stuff that was lying around, and raised the level 10 cm with some 1 x 4's (lighter than 2 x 4 but slightly awkward as not so wide). Note cut-outs for the pipes. The insulation goes not-quite-to-the-edges, as I understand this is required for ventilation.

* Looking back the other way, the wires that lead down to Miranda's main light. More context.
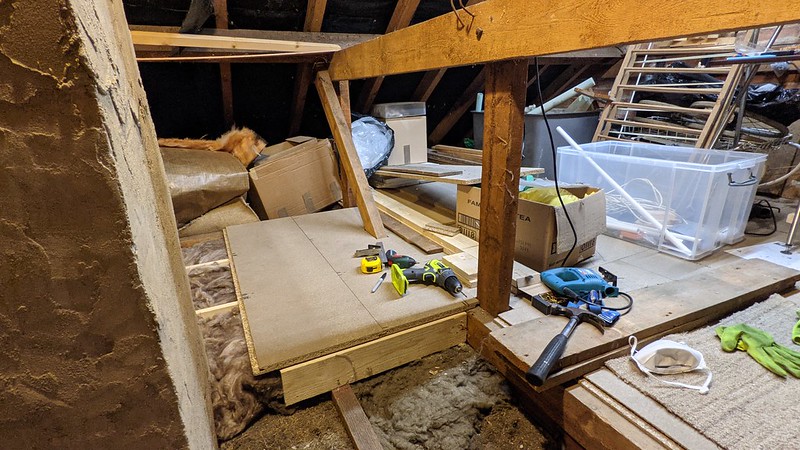
So now, infill the extra 10 cm height with (old pink) and (new white / grey) stuff, and then put 18 mm 48" chipboard on top. It is a bit of a pain getting started and getting a platform that can be stood / sat on stably without risking going through the ceiling.
At this point I've run out of <stuff>, principally the 1 x 4, so it is back to B+Q for some more.
* View of the middle, showing some wires...
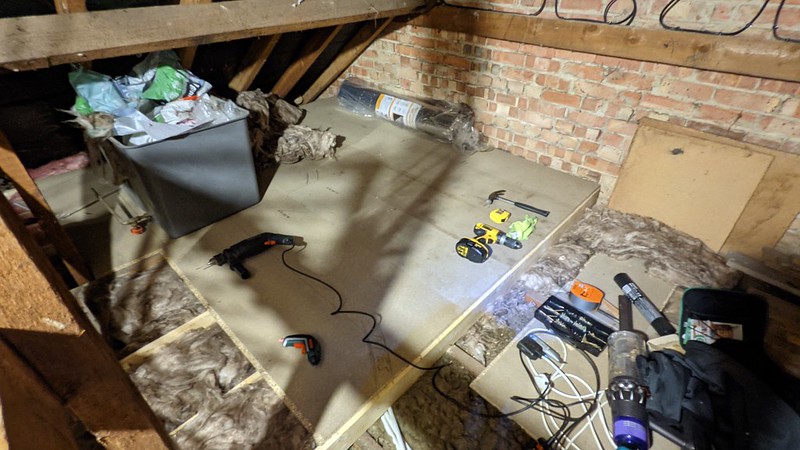
Here's how I left it at 7 pm on Saturday. I've got form one side into the middle. The big grey box is the old water tank that needs removing. Notice that I am (humiliatingly) using a corded drill with a - gasp - keyed chuck. That's because my stupid deWalt charger refuses to charge my generic replacement battery.
The Next Day: Sunday
That was Saturday. Sunday is another day. Running an extension lead up from below is tedious, so I connected to the existing light wiring, on the grounds that I'm taking lowish current and not for long, and just plugged in some LED lighting. Headtorch no more! I also got another thing of insulation, this one apparently in "blocks" not a roll (pic of yesterdays; pic of today's showing the blocks), with some thought of using it between the rafters. However it is 18" not 14", and my rafters are somewhat variable between 15 and 17, and it doesn't compress laterally well. It can be cut, but it's a bit of a fuss.
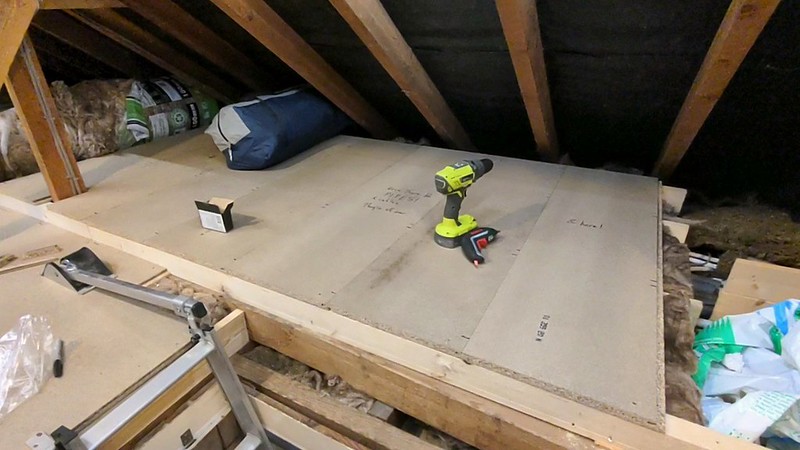
My main beams are awkwardly spaced, so it is just a fraction short to bridge across the middle, so the ones on the R (looking from the loft hatch; the last ones laid today) are supported at the R end by battens. Where the pesky water pipes go is marked on the boards, but anyway there are pix to show.
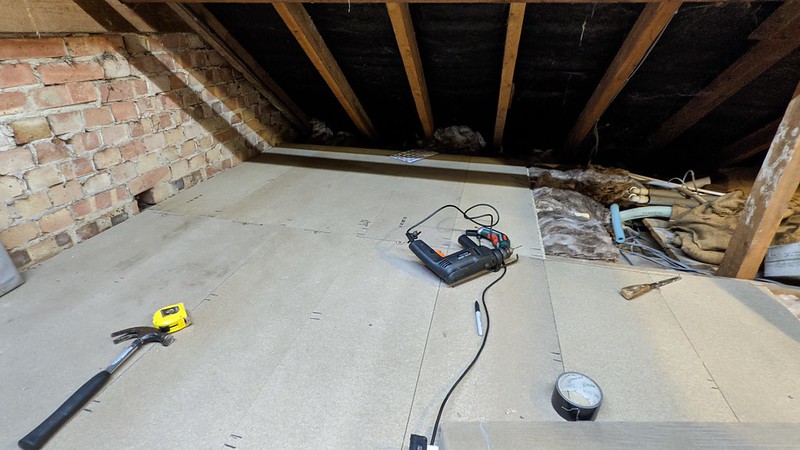
Here's where I am at the end of the day. A decent amount of usable area now. Next steps are either to go R to the loft ladder or more likely forwards into the slope and get all the way across, which is probably less awkward, and will give me more space to clear other stuff into.
This pic shows the new "block" insulation and it is easier to work with.
The Third Day: Monday
Sneaking in a little work in the lunch hour. Not to spoil the surprise, here's how I finished.
The only interesting "hidden" thing is the wires leading to the ceiling rose in the "laundry" bedroom. You can see those here (or with more context here); and they're marked on the chipboard. Next step is probably to push towards the pipework, if I'm feeling brave. Incidentally, the old underlying insulation wasn't so bad here: it seemed to have been laid better. Nonetheless it was only about 5 cm thick at best, so I still overlaid it with new.
The Fourth Day: Tuesday
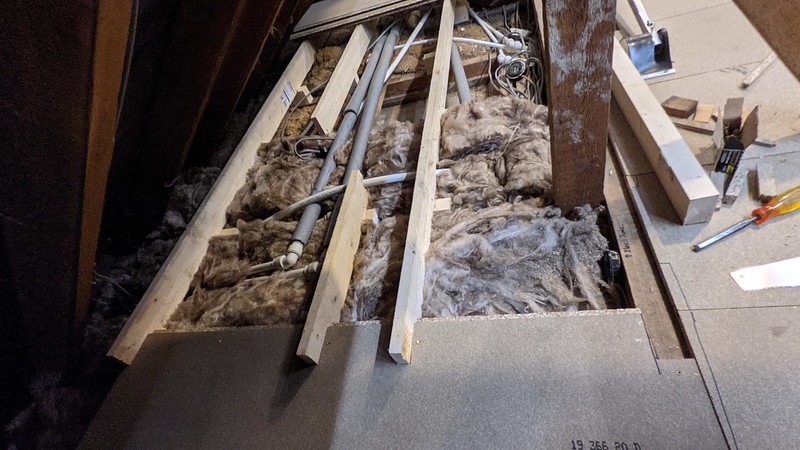
Less action today; no new floor laid. Instead I crept gingerly towards the piping. L is towards the center; R towards the road, top towards the neighbours. We're about over the wall separating shower room from small bedroom; indeed I think the wires going down at the L are the ones for the lightswitch in that room. The pipes off the bottom head towards the boiler; those off R head towards the wall and down.

I've lifted some of the wooden planks that were supporting the (now long removed) cold water tank, and removed rather a lot of sawdust, which I think has been there since the construction of the house. Tomorrow I need to extend the new joists (visible at top) downwards, without damaging the pipes.
Fifth: Wednesday
Not much today. Hoovered up more sawdust, considered the pipes a bit. On the "floored" other half, I tidied up and took down the side boards on the street side, in prep for the boilerman tomorrow. My new Ryobi cordless drill turned up.
Sixth: Thursday
The boilerman came today (Compton and Parkinson) and he thought the leak was probably in the boiler, perhaps the pressure relief valve (PRV); if so, that would be good news(as the runoff is onto D's roof). While he was doing that - about 30 mins total - I cleared out behind the chimney somewhat, an area that has been a dumping ground for generations. And then got a couple more boards down. There's a bit of wiring underneath - one fairly neat grey one, you can see it here - but nothing that needed noting.
Here are the two new boards - you can also see my new Ryobi cordless. I'm starting to hit the non-linearity of the roof I think; the nearest thing to a right angle is the chipboard, which shows up the wonkiness elsewhere.
Seventh: Friday
I've extended backwards a little from where you can see, towards the garden side.

There's a white/grey wire running across as you see; I've marked it on the board to the R. Note Mfd+J's old carpet which we must have thrown up here some time ago. perhaps I'll actually use it, but for the moment it is annoyingly in the way. Next pic: with the boards on. Notice annoying little gap where the "sticking out" board butts onto the chimney and it seemed easier not to cut it.
I cur the sticking-in "joint" on one of the panels, so it can be lifted once unscrewed, because if I didn't do that you'd have to lift the whole floor from one end. I'm now out of insulation and 1x4s.
Eighth: Saturday
And on. I'm on the garden side, working R to L, now level with the chimney stack, hence the slightly awkward hole you see at the bottom R; I'll probably fill that later. Note that the panel here - you see it says "LIFT" - has had the connector cut. Old carpet abounds. I feel I am nearly at the point where I can unroll it all and have it as a useful addition, instead of being muchly in the way. The old wasps nest is now fully cleared away (that pic also shows the old black, possibly no-longer-live, wire at the back). And I bought some more LED lights to illuminate this bit.

Silliness of the day: using my jigsaw to cut some 4x1 I foolishly cut towards myself... and thought that being 3" from the cut would be fine, but I was careless. No fingers lost, and not much blood.
Ninth: Sunday
Perhaps 3-4 hours worth today. Around the back, on the garden side, I've not got past the chimney.

I think I'll be able to unroll the carpet soon, which will free up more space, which will allow more. Soon, I'll get to the bit I've already floored decades ago, which is going to require re-work, I think. Looking the other way, I've got to the loft hatch, and raised the loft-ladder supports up.

Notice that I somewhat stuffed up the cutting of the board nearest the hatch, but that can be "fixed" by bringing in the one that will go over the pipes, to the L. Once I've worked out what to do with the pipes; it is a bit of a mess. Meanwhile, since there were the parts lying around, there's now some shelves at the back. I'm down to two bits of 4x1 left, so may need another B+Q trip soon.
Monday: not much. Had a look and saw that all was good. Thought about the piping a bit: rather than rearrange it, perhaps I could go to 300 mm and get above it? Could even use the "loft legs" there, perhaps? Also put off doing anything about the carpet. Did remove and bin the old yellow vacuum cleaner, and the stack of microVAX imaging boards.
Tenth: Tuesday
Thinking overnight, I realised I could fix the problem of the mess of water pipes by raising the floor higher there, perhaps to the recommended 270 mm depth of insulation. So, off to B+Q to get some "loftlegs". But! These turn out to be 270 mm tall: not 170, which I'd expected, since the joists are 2x4. I almost buy some anyway, indeed I get as far as putting two cases on my trolley, but then I think again and realise that buying some 2x3" will get me 75 mm just as well. And be cheaper, too. So I do that, and here is the result, or the beginning of same: 1x4, as before, raised 75 mm on 4" of 2x3". the pipes weaving too and fro means that some of the blocks aren't quite in line, but they'll do.

Eleventh: Wednesday
Still at work on the road side. The back joist goes in fine, but the middle one is tricky, due to the pipework. I end up putting in 2/3 of it, but a little further back than it really should be; and then on the L end put in a short one, offset. This, combined with a "DO NOT STEP! WARNING! PIPES!" notice towards the left should serve (though the chipboard is fairly strong and I think you will be able to step there without problems; it's so low you can't, though). There are a few little cuts and adaptions around pipes, but nothing that needs recording.

Twelfth: Thursday the 14th
Continuing on yesterday's theme. First I need to straighten out the bathroom light, since I'll be covering over its wires. This involved vacuuming all the sawdust out near it (remembering all the stuff that fell down into it last time), putting tape over the rough edges, disconnecting the light and taking it downstairs to clean it carefully, attaching some wood strips with hotglue, and sticking it to the ceiling with D's help with same. And it stays there, now making the ceiling look rather dingy. A somewhat awkward view from above; the white box is the transformer.
Attach one of those round wiring-junction thingies to the beam.
And so, here is before (or here), and then after:
The irregular spacing is obvious but as before I blame the plumbing. This will get an extra cross-layer before the boards go on. BTW, as should be obvious from the earlier photos, all this area is absolutely bone dry.
Thirteenth: Friday the 15th
Proceed along, filling and flooring. I've now run out of 2x3, which is why I stopped.
Fourteenth: Saturday the 16th
And here we are, with the boards continued about as far as I can, without hitting the next snag, which is the existing boarding off to the R. I think I may have some more to do behind the chimney, but then I'll have done all the boards on this side, and I'll need to decide if I want to re-do the other side where the boiler is, which is nicely pine boarded, but with no insulation.
I want to put some foil rafter insulation up, but at the moment I lack (heavy duty) staples. Also, the question of the carpet arises.
Notice that I've put the big old Blacks' "Calder" tent up there - it is starting to be of use!
No comments:
Post a Comment