
This was as much to seal it and remove the last few cobwebs as anything else; but it does make it somewhat brighter, too. As you can see, though, that wall is pretty roughly masoned. And so I thought - rather later on - "you know what, I could tile it. That would hide the cracks". And so off I popped for the cheapest white tiles (150x150x3mm, £6/m2) and some perhaps-surprisingly-expensive glue/grout (you seem to need a surprising amount per m2, according to the tub. I got the premixed stuff).
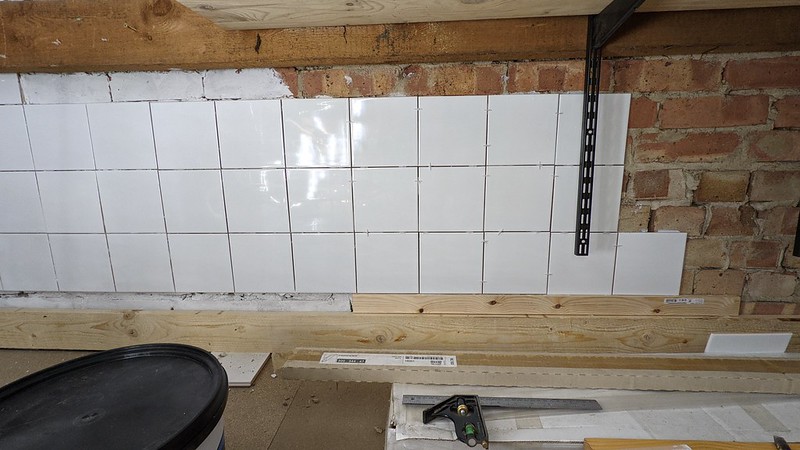
But, back in the loft I realised just how rough that wall it; it isn't close to flat. I might come back to it in a bit, but for now I thought "aha! I could do the chimney instead". The chimney is rough-plastered, but is somewhat flatter than that end wall. And it is annoying, in that you brush against it and some of the sandy plaster comes off on you. I started on the garden side, out of view from the hatch. And here's the results of an hour or two.

4x4 is 0.6x0.6 is 0.36m2, so I've got a way to go before I run out of tiles (I got three boxes of 44 each, aka 1m2 each). If you look very closely you can see I've slightly missed my mark, which I drew on the wall, so the whole array is slightly tilted. I think the std.trick of screwing a batten onto the wall at the lowest level would be a good idea; the tiles also have a slight tendency to slide downwards, and it would stop that too. Now I look, you can see the underlying pattern of bricks through the plaster.
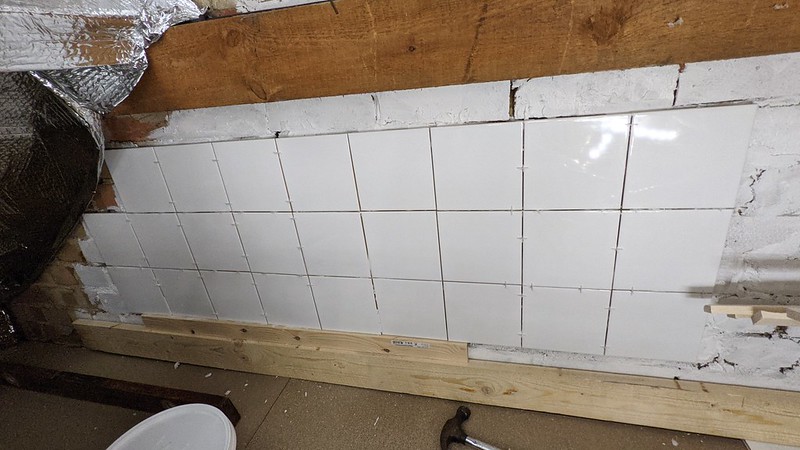
The next day: I had a brilliant idea for doing the end wall: rather than spreading the cement, and tiling on top, I could "blob" the cement on the four corners. That way it could plausibly be thick enough to deal with the end-wall's irregularities. Also, I used the "batten trick", but just laying wood of the rightish height on the nearly-flat floor. And after a bit I had:

Which is a start. After this I grouted the chimney tiles, but didn't take a picture. But I did the next day. Side view. And on the end wall:
With the 16 on the chimney, I've now used up the first box, and perhaps 2/3 of the cement / grout. The end wall is kinda going OK... the cement is blobbed on pretty thickly where the wall is uneven, well over the nominal 3 mm max thickness, so it may take a while to dry.

Going up from behind the beam is tricky. I first thought it might be easiest to stick two tiles together, and tried that with cement on their backs (the third is just to align them), but while it worked for a bit, it didn't hold for long enough to use.
In the end I just did them one-by-one, being somewhat hopeful behind the beam; I think I scraped some excess mortar so they could lie flat.
Here's a pic looking down; you can see the spacers in place. Putting them onto the lower tile was tricky. Obviously I won't be able to grout these tiles unless I try really hard, which I won't.
My pic shows you that I have a new pot of cement+grout, about twice the previous size, this one from Unibond and consequently more expensive (£37). It feels "fluffier". You can also see my "megatile", bought because it was there, for £2. It is 300x600mm. I did think about using that to span the gap, but it was awkward to place, because of the roof angle.
I also bought a tile file (£10) and tile nippers (£15 ish) but haven't used either yet.
I don't know how enthusiastic I'm going to get about tiling around the wires. I wasn't terribly precise about painting around them...


No comments:
Post a Comment