This post on the Citroen owner's club was helpful for how to dismantle; it links to this post also about how to dismantle. I'll assume you've read those two, or at least skimmed them. But to write down the bits that puzzled me:
1. Take off the two "obvious" Torx30 screws (which I did with a plain flat head, lacking a 30. Fortunately, unlike so many screws on so many things, they hadn't been tightened to death and came easily).
2. Now you have to pull off the plastics. This is a pain, hard to do cleanly (mine had clearly been done before by an unskilled hand as the screwdriver marks on the plastics were obvious) and the fastenings that are supposed to just pop out don't always do so easily. There are two layers if I reall correctly; the "outer" and "inner" of which the inner was harder. The inner didn't need to come fully off to get access to...
3. The two "hidden" Torx30. Once these are off its still a bit awkward to lift the "spoiler" containing the top light unit out of which the water is supposed to come. It kind of "hinges" upwards, restrained by some more pop fastenings, but no more screws.
4. Having done that you can push out the "light unit", though you may not need to.
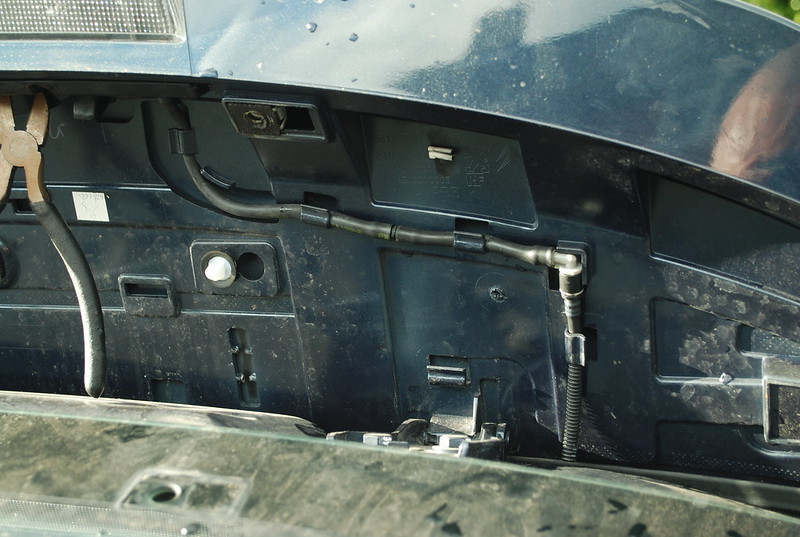
OK, now you have access to the bits you need to see. Let's have a picture:

This is the "spoiler" lifted up, held as you see by the pliers. The water piping is bizarrely complex. WHY are there so many sections? A single piece of flexible hose would appear so much easier and less error prone (but see below for the true answer). The joint in the middle is particularly problematic.
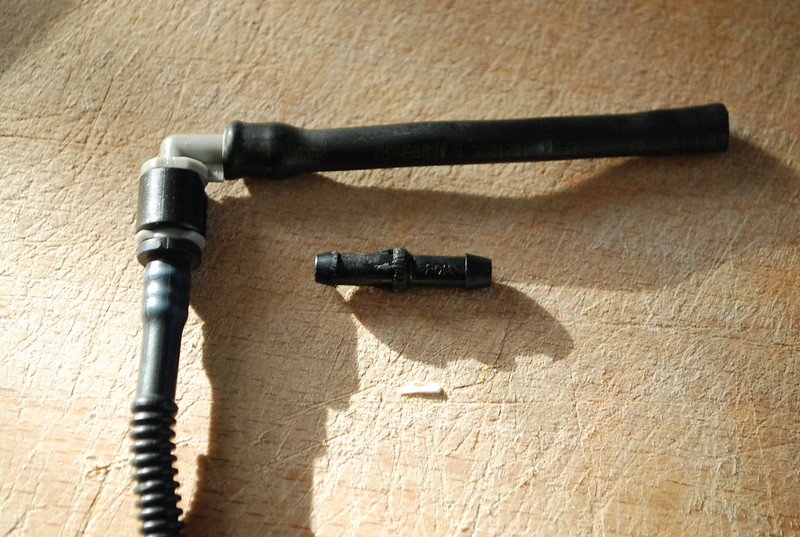
It is actually joined by the little joiny-piece shown below. Which looks like a simple joint, but it isn't, oh no, that would be far too easy.

Inside, as you can just about see from this pic, is a tiny little ball bearing, pushed by a tiny little spring. Why? Possibly as some kind of pressure-reducing mechanism? [No: thanks to HT who points out that it is a non-return valve, and the purpose of it is to stop the fluid flowing back into the tank, which means that the fluid-squirting happens sooner. Apparently its part of the MOT test for squirting to happen without much delay.] Anyway, that's why there's a join there. Incidentally, pulling the joint out of the rubber is a right bastard. That little flake of white plastic was in there, leading me to suspect aha! That's the problem: the little flake is jamming the "valve" somehow. But no. Nor, indeed, did removing the valve entirely and gaffer taping the pipe together help.
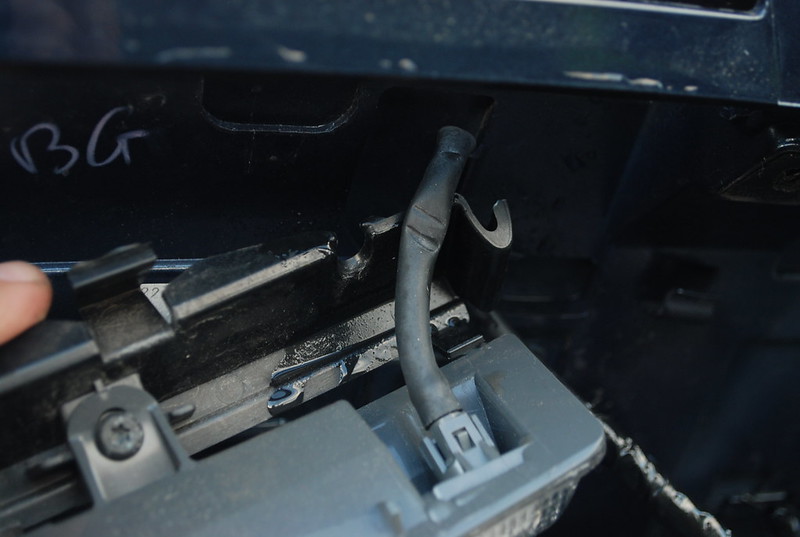
My last pic shows the true problem. At the bottom is the washer fluid outlet. In the middle is the hole at the edge of the light unit plastics that the pipe is supposed to go through. And on the pipe itself is obvious crimping showing clearly that the idiot who reassembled the unit failed to get the pipe in the hole, thereby constricting the pipe so much that no fluid could flow.

The fix is then simply to reassemble carefully, getting the pipe in the hole (having squidged it with pliers back into circularity). I did reassemble the odd ball-valve-thingy, even though it appeared to make no difference to the flow.
I was then left with the odd co-incidence of two problems not one: the broken flexible pipe, and the crimped tubing. Possibly the broken pipe is breakable, and the extra stress of the tube being crimped caused it to fail? I will never know for sure.
And, yes, it then worked.
One last thing: on my first go at reassembly, I had a panic when nothing at all worked: even the rear wiper no longer did anything. However, that turns out to be because I hadn't shut the tailgate fully. Do that and it springs into life.
No comments:
Post a Comment